You’re Ready for Spring, But Is Your Bike Ready?


Spring has sprung and you are just itching to get out there for a ride on your bike.
A good tune-up will reduce your risk of having unsuspected breakdowns or worse an accident caused by faulty equipment on the trail or road.
Tools You will need are
- Open ended wrenches
- Allen wrenches
- Spoke wrench
- Old Toothbrush or cleaning brush
- Lubricant
- Mild detergent
- Cleaning Rags
Overall cleaning
I’m assuming you have taken the time to clean your bike up after that last mucky fall ride before you put your bike away, but if that isn’t the case you have some work ahead of you.
Heavy Cleaning method
I Don’t recommend using a hose, but in this case it’s a necessary evil. Direct the water from a hose down over the bike, avoiding all bearings. You will find the bearings in any area that has spinning parts (i.e. Wheels, or pedals). Never use a pressure washer. Use a soft sponge or cloth and mild biodegradable cleaner to touch up the other heavy areas until your bike is clean overall.
Light Cleaning method
Taking the time to keep your bike clean all the time is a better way of course. For light cleaning use a cloth to wipe down your bike. A mild biodegradable cleaner should work fine. Use as little water as possible when cleaning.
Where you have moving parts that use lubricant. you’re going to be faced with the black mess, which is a combination of dust from the road and the lubricant. I would advise using as little water here as possible or you will end up with more work for yourself.
To clean the chain, moving parts, and places that do not come clean easily, use an old toothbrush and a lubricant with a solvent additive. There are specially made products you can purchase from a bike shop or WD40 can also be used to clean.
For the chain, you could also remove the chain and shake it in a plastic bottle with a bit of degreaser, then wipe it down with a rag. Whatever you do, don’t spray directly onto your bike, all the overspray will gunk your bike up.
Inspection Checklist
Frame
Look for cracks and dents that could be trouble later. A dent could cause an accident on the trail the same way a crack could if it is in the right place.
Headset
The headset is where the handlebars and forks meet.
- Test the headset by depressing the front brake and tilting the bike front to back. If you hear that metal on metal clicking sound your headset is loose; tighten it up a bit. Don’t over tighten these bolts or you may cause damage to the frame.
- Check the bolts and threads to ensure they are not stripped.
Bottom Bracket
Your bottom bracket is the cross section where your pedals and crank join. The bottom bracket contains an axle with a fixed cup on one side, 2 bearings, and an adjustable cup and locking ring. This area of operation is critical for you to direct energy into the bike.
- Check for wobble, you may choose to take it apart and inspect the bearings and look for wear if you do find too much play in this area. Checking this area requires you to remove the chain. This should move freely without resistance.
- Check for crimps and cracks, rust, dirt, and tension in the cables. Cables will stretch and wear over time. A cable that is too slack can be tightened with the screw where the cable attaches to the brake lever. Annual replacement should be considered if you are a regular rider. Lubricate your cables and wipe away excess lube so that things don’t get gunked up.
Wheels
Rims and tires are a huge safety factor and not given enough attention by most. Every time you ride they take a pounding from the roads and your braking system. They are in contact with all the dangers of the road.
- Check for nicks, dents and scratches on your rims. If there is excessive wear it may be time to replace the rim.
- Clean with alcohol
- Check thru your quick releases to make sure they are all tightening properly.
- If you deflate your tires a bit you can see if there are cuts on the walls or sidewalls.
- Check for rot or leakage, and check the wear of your tires.
- Inflate the tire to the tire pressure (psi) listed on the sidewall of the tire.
- Do the spin test for lubrication and wobble. A wobbly rim can be fixed by adjusting the tension of the spokes. This is a bit tricky so if you don’t need to adjust them don’t. You can mess up a good rim just as easy as fix it. Checking spokes is like tuning a guitar; it’s done in relationship to one another. If you notice a spoke extra loose or broken all together, replace and tighten. I highly recommend using a bike shop to get your rim spokes fixed up if you have the extra money for it.
Chain and Rails
This is like the transmission of your bike. It’s what takes your power and converts it into forward movement. There is nothing more annoying than a chain slipping when you shift or worse your chain falling off when you are getting ready to take off from a stop. Can anyone say pain? A bike stand is helpful for this step but if not you will need a way to hold the back wheel off the ground
- Check all the gears shift correctly
- Look at the chain and chain rings for excess wear, missing teeth, etc. This is likely where you will have issues. Chains are replaced often. Lubricate them a minimum of every 100 miles, after 2000 miles you will need a new chain. Dirt on the chain combined with the oil will create even more wear so it’s important to clean the chain clean.
- Lubricate the chain with proper lubricant. WD40 is not a sufficient lubricant. It’s a great solvent for cleaning but it is too light for a proper chain lubricant.
- Clean the sprocket with a damp cloth and mild soap
- Clean the Derailleur up and lubricate moving parts. If you have issues and the chain has been ruled out for the problem, your derailleur could need adjustment or replacement.
Brakes
- Your brakes include the brake pads, arms, levers, and cables. All these areas should be inspected.
- Check the wear line on your brakes to ensure that there is enough brake left for the season and to ensure there is an even wear.
- Ensure that the brakes are hitting the metal side of the rim and not the rubber
- When you depress the brake, both breaks should hit at the same time on both sides. You can adjust the brakes by turning the brake arm tension screw. Always make small increments when adjusting.
- Removing the brakes entirely will allow you to put more grip on them with a light emery cloth rub.
Lights, Seat and Bars
- Make sure your lights all work
- Maybe a new set of grips are in order this year.
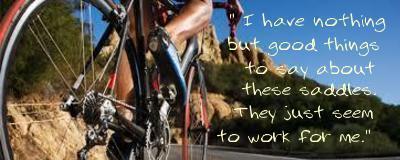
- Have you thought about your seat? Having a comfortable seat to ride is just as important as any other aspect of your bike. If you aren’t comfortable you won’t be riding long. Riding should always be an enjoyable and healthy experience. If you are not comfortable when you ride, you haven’t tried a Spiderflex seat.
- Don’t forget to check your quick release for your seat if you use one.
Get Yourself Ready for Spring
- Take the time to aclimate yourself to your riding regime
- Take short rides first
- Make sure you layer your clothing so you don’t overheat, and watch for cold induced fatigue
- Always wear your helmet
- Watch for surface changes and potholes while you are out there on the road
Now get out there and enjoy your spring riding.
-Laurel Jorundson
Tags: Bike Tune-up Tuneup Spring Maintenance cycling Bicycle